hours left for
same day shipping
SHOP BY LW BRAND
SHOP CATALOG
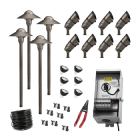 Easy-Install Kits
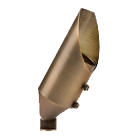 Uplights
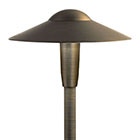 Path & Walkway Lights
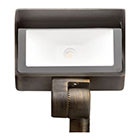 Flood & Wall Wash Lights
 Hardscape Lights
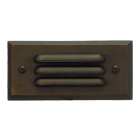 Step Lights
 Outdoor Deck Lights
 Outdoor Bulbs
 RGBW Color Lights
 Downlights
 Underwater Lights
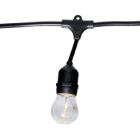 Bistro String Lights
 Holiday Decorations
 In-Ground Well Lights
 Accessories
 Solar Lights & Portables
 Specialty Lights
 Bollard Lights
 Tape Lights
 120V Landscape Lighting
 Dark Sky Approved Lights
 Connectors
 Wire & Cable
 Timers & Control Devices
Always Here for You.
Lighting Warehouse offers direct support to customers. We always have your back.
Save More When You Become a Customer!
Lighting Warehouse offers support to customers at home.


December 28, 2024
Table of Contents: Installing an LED Dimmer Switch: A Guide
Installing an LED dimmer switch can take your landscape lighting setup to the next level and set the mood for any occasion. Whether you’re hosting an electrifying late-night gathering or enjoying a quiet moment under the stars, the right lighting makes all the difference.
This guide will go in depth on everything you need to know about dimmer switches, including how to install a dimmer switch for LED lights, why dimmer switches can be an absolute game-changer for your landscape lighting design, and common dimmer switch problems (and how to resolve them).
Dimmer switches give you precise control over the brightness of your lights so that you can adjust the intensity to fit the mood or time of day. You see them inside people’s homes all the time, but dimmers aren’t only made for indoor settings—outdoor dimmer switches offer a wide range of practical benefits for your landscape lighting as well.
Whether you want to create a soft, gentle glow around your garden or brighten up your walkway for added safety, installing an LED dimmer switch outdoors can offer unparalleled versatility for your lighting design.
Here are some ways dimmer switches can enhance your landscape lighting setup:
If you’re just here to upgrade your lighting, feel free to skip the technical details. But if you’re curious, here’s a simplified look at how dimmer switches work—it’s a bit complex, but understanding the basics can help you make smarter choices!
Simply put, dimmer switches control the brightness of lights by adjusting the amount of power delivered to them. Back in the day, traditional dimmers worked by reducing the voltage, which created heat and resulted in inefficiency. This meant that while the light intensity was lowered, the dimmer still consumed excess energy and generated unnecessary heat.
Modern dimmers, on the other hand, use advanced phase-cutting technology. This technique rapidly switches the power on and off, adjusting the flow of electricity to control the brightness of the light without wasting energy. By doing so, these dimmers operate more efficiently and generate less heat compared to older models.
There are two main types of dimmer switches:
The right dimmer switch can elevate your outdoor lighting experience, giving you control over brightness, ambiance, and energy efficiency.
But not all dimmers are created equal, and selecting one that fits your specific lighting setup is essential to ensure smooth functionality and optimal performance. Compatibility is the most critical factor, but there are other key considerations to keep in mind.
Here’s what you should look for when choosing a dimmer switch for your landscape lighting system:
Installing a dimmer switch for your landscape lighting is a manageable DIY project, but safety should always come first.
Dimmer installation involves handling electrical connections, so proceed carefully. If you’re uncertain about any step, don’t hesitate to consult a licensed electrician.
Here’s a step-by-step guide to help you through the process.
Before starting your dimmer switch installation, it’s important to have the right tools on hand to ensure a smooth and safe process.
After all, being prepared doesn’t just save you time but also helps you avoid unnecessary interruptions.
Here’s a quick list of the essentials you’ll need to get the job done:
Safety should always come first when working with electrical systems. Begin by locating your circuit breaker and switching off the power to the lighting circuit where you’ll be installing the dimmer.
Clearly label the breaker or inform others in the household to avoid accidental reactivation while you’re working. In other words, let everyone in your household know that the circuit breaker is off-limits!
Once the power is off, use a voltage tester to confirm that no electricity is flowing to the wires. Touch the tester to each wire in the junction box to ensure it reads zero voltage. For first–time users, check out our guide on how to use a multimeter.
Skipping this step can result in serious injury, so take the time to double-check before proceeding.
Start by unscrewing the cover plate of the existing on/off switch to expose the wiring. Next, unscrew the switch itself from the junction box. Be careful as you pull the switch out, ensuring the wires are not damaged or stretched in the process.
Once the switch is accessible, carefully disconnect each wire. Most standard switches have a few key connections: the hot (live) wire, the neutral wire, and the ground wire (identified in the next section).
Take note of where each wire is connected, as this will help during the installation of the dimmer switch. You can use a piece of tape or a label to mark the wires for easier identification later.
Now it’s time to connect the dimmer switch to your lighting system. Start by referring to the instruction manual that came with your dimmer for specific wiring instructions. Different models may have slightly different setups, so it’s important to follow the guidelines provided.
Once you’re ready, attach the dimmer’s wires to the corresponding wires in the junction box. Use wire connectors to secure each connection, ensuring they are tightly fastened to prevent any loose connections that could lead to electrical issues.
When wiring your dimmer switch, it’s essential to connect the wires in the correct order, as identified by standard electrical guidelines, to ensure safe and effective operation:
Finally, double-check each connection before securing the dimmer switch into the junction box to ensure everything is correctly wired.
After the wiring is securely connected, it’s time to mount the dimmer switch into the junction box. To start, carefully position the dimmer so it fits snugly within the box.
Then, make sure that the wires are tucked neatly behind the switch to avoid any pinching or strain on the connections. Once the switch is properly aligned, screw it into place using the mounting screws provided with the dimmer.
Next, replace the faceplate over the dimmer. If your dimmer switch is designed for outdoor use or exposed areas, make sure the faceplate includes weatherproofing features to protect against moisture and dust. Tighten the screws on the faceplate to firmly secure it in place.
At this point, the dimmer switch is securely installed and ready for testing.
With the dimmer switch securely installed, it’s time to test the system to ensure everything is functioning as expected.
First, return to the circuit breaker and switch the power back on. Once the power is restored, gradually adjust the dimmer switch to see if it smoothly controls the brightness of your landscape lighting. If the lights brighten and dim as intended, the installation is successful.
Take a moment to test the full range of the dimmer, making sure it works from the lowest to the highest setting without any flickering or buzzing. If everything seems to be working properly, you’re all set! But if you notice any issues, double-check the wiring or consult a professional.
Now that we’ve covered the basics of how dimmer switches can enhance your landscape lighting, let’s dive into some specific areas where they can make a real difference in creating the perfect outdoor ambiance.
With the ability to adjust brightness, dimmer switches offer versatility that allows you to fine-tune your lighting to suit different moods and functions.
Here are some practical applications for dimmer switches in landscape lighting.
Walkway and path lights are essential for both safety and ambiance in your outdoor space. Installing dimmer switches allows you to adjust the brightness based on the time of day or specific needs.
For example, you can brighten the path for clear visibility during late-night walks, then dim the lights for a soft, intimate glow during evening gatherings. This flexibility enhances both function and aesthetic, providing safety without overpowering the natural beauty of your landscape.
Outdoor accent lighting can transform your garden by drawing attention to key features such as sculptures, trees, or water fountains. Dimmable spotlights are perfect for this purpose, as they allow you to adjust the intensity of the light.
Dim the spotlight for a soft, subtle glow that creates a peaceful atmosphere, or brighten it for a dramatic lighting effect that highlights the focal point of your garden. This versatility helps you create the exact mood you desire for your outdoor space.
Whether you’re hosting lively outdoor dinner parties or enjoying quiet evenings, dimmable outdoor spring lights on your deck or patio can set the perfect tone. Install string lights or wall sconces to create a warm, inviting atmosphere.
You can easily adjust the brightness to fit the occasion—lower the intensity for a relaxed vibe or brighten it up for a festive gathering. This level of control over your lighting helps enhance the overall experience of spending time outdoors.
Fountains and poolside lights are not only functional but also serve as beautiful features in your outdoor space. By using dimmers to adjust the lighting around these water features, you can enhance both safety and aesthetics.
Brighten the lights for visibility and security during night swims, then dim them for a serene, calming glow that accent the soothing sounds of running water. Whether you’re relaxing by the pool or hosting a gathering, dimmer switches create the perfect lighting to suit any moment.
Adding dimmer switches to these areas of your landscape lighting system lets you balance practicality with style, so your outdoor space is always perfectly lit for whatever you need.
Even with the right dimmer switch installed, you may encounter a few issues from time to time. Fortunately, most problems are easy to troubleshoot and fix.
By addressing these common issues, you can keep your landscape lighting system running smoothly and ensure that your dimmer switches work as they should.
Here are three common challenges you might face with your landscape lighting dimmer switches and their straightforward solutions:
Outdoor environments can be tough on electrical components, and that includes dimmer switches. To keep your landscape lighting operating smoothly, regular landscape lighting maintenance is essential.
By taking these simple steps to maintain your dimmer switches, you can extend their lifespan and keep your lighting system functioning and looking its best year-round.
Here are some key maintenance tips to help keep your dimmer switches in top condition:
Dimmer switches are a powerful addition to any landscape lighting system, offering unparalleled flexibility, efficiency, and style for modern homeowners. Whether you’re hosting a backyard party or enjoying a chill evening, dimmers allow you to tailor the atmosphere to the perfect degree.
By understanding how dimmer switches work, selecting the right one, and installing an LED dimmer switch safely, you can transform your outdoor spaces with ease. Take control of your landscape lighting and see the difference dimmers can make!
Just remember to always consult a professional if you’re ever in doubt during the installation process.
No, not all dimmer switches are compatible with LED lights. Many standard dimmers are designed for incandescent or halogen bulbs and may cause flickering or buzzing with LEDs.
To ensure smooth and efficient performance, choose an LED-compatible dimmer, such as a trailing edge dimmer, specifically designed to handle the lower wattage and unique electrical characteristics of LED bulbs.
Yes, dimmer switches help lower energy consumption by reducing the amount of power delivered to your lights. When you dim the lights, you use less electricity, which not only reduces your energy bill but also contributes to a more eco-friendly home.
Keep in mind that LED lights are especially efficient when paired with dimmers, as they maintain energy savings even at lower brightness levels.
Not all dimmer switches are weatherproof, and using an indoor dimmer outside can lead to damage or electrical hazards. For outdoor applications, opt for dimmers specifically designed to withstand the elements or install them within a weatherproof enclosure.
These enclosures help protect against moisture, dirt, and temperature fluctuations, ensuring the longevity and safety of your landscape lighting system. Always check product specifications to confirm outdoor compatibility.
An incorrect or incompatible dimmer can lead to issues when testing your landscape lighting dimming setup. The issues range from flickering lights, the overall illumination not being as bright as intended, or inconsistent lighting across all of your bulbs. Before making the final purchase, ensure that both your dimmers and bulbs are compatible with each other to avoid repeat trips to the store or potential hazards during installation.
The main limit to the number of LED bulbs on one dimmer is dependent on the dimmer’s wattage limit. Add up the total wattage of lights connected to the switch and ensure it’s lower than the dimmer switch limit. Going over might cause issues with your bulbs’ performance or cause damage to your electrical setup.
In addition to installation tools like wire connectors and a screwdriver, you should also invest in a multimeter to ensure that there is no electricity flowing through the wires during installation. The same device can also be used after installation to confirm that each connection is working as intended. Safety equipment, such as insulating gloves, are also recommended to protect yourself from any electrical shocks that could damage the system or even yourself during the process.
Join our Insider list and check out the different lighting options that we have to offer.
Sign up for exclusive offers and insight into what’s new for Lighting Warehouse. Elevate your outdoor lighting today!
By inputting your email, you agree to receive recurring promotional emails to which you may unsubscribe at your discretion.
Start Building Your Landscape Lighting System Today at Lighting Warehouse!
Monday - Friday

Speak to us at 855-444-8424