hours left for
same day shipping
SHOP BY LW BRAND
SHOP CATALOG
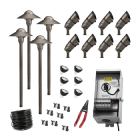 Easy-Install Kits
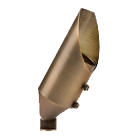 Uplights
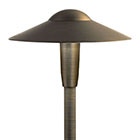 Path & Walkway Lights
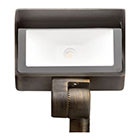 Flood & Wall Wash Lights
 Hardscape Lights
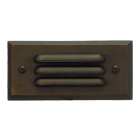 Step Lights
 Outdoor Deck Lights
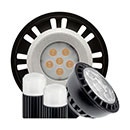 Outdoor Bulbs
 RGBW Color Lights
 Downlights
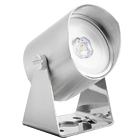 Underwater Lights
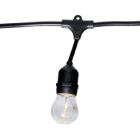 Bistro String Lights
 Holiday Decorations
 In-Ground Well Lights
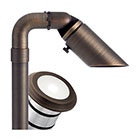 Accessories
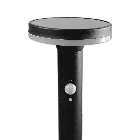 Solar Lights & Portables
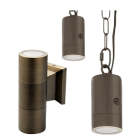 Specialty Lights
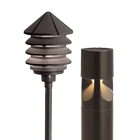 Bollard Lights
 Tape Lights
 120V Landscape Lighting
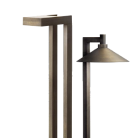 Dark Sky Approved Lights
 Connectors
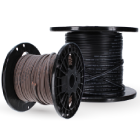 Wire & Cable
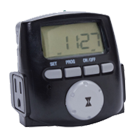 Timers & Control Devices
Always Here for You.
Lighting Warehouse offers direct support to customers. We always have your back.
Save More When You Become a Customer!
Lighting Warehouse offers support to customers at home.


November 03, 2024
Table of Contents: How to Install Deck Lighting on a Post
Knowing how to install deck lights on posts is a simple yet transformative way to elevate the ambiance of your outdoor living space. By installing lights on your deck or patio posts, you not only create a warm, inviting atmosphere but also increase safety and visibility for nighttime gatherings.
Whether you like hosting evening barbecues, relaxing under the stars, or simply enjoying some quiet time, the right deck post lighting installation can make all the difference.
This guide will walk you through everything you need to know about how to install deck lights on a post, from selecting the right type of lighting to the installation process.
Before diving into the how-to, it’s important to understand why post-mounted deck lights are a popular choice:
Now that we know why deck lighting is important, let’s get into the step-by-step guide for how to install deck lights on posts. To save money on your new fixtures while still providing adequate lighting, we recommended a low-voltage landscape lighting setup, which brings multiple benefits.Now that we know why deck lighting is important, let’s get into the step-by-step guide for how to install deck lighting on posts.
Before you begin any installation, your safety is the top priority. Start by turning off the power to the area where you’ll be installing the lights.
Locate the circuit breaker connected to your deck or outdoor space and switch it off. Double-check the outlets and switches to confirm there’s no power running through the lines.
Working with electricity can be dangerous, so it’s crucial to take precautions by wearing insulated gloves and using landscape lighting tools with non-conductive handles to avoid shocks or accidents.
When installing deck lights on posts, selecting the right type of light is crucial for both safety and aesthetics. Two popular options for post-mounted lighting are rail lights and outdoor step lights. Each serves a unique purpose and enhances your deck’s functionality and beauty.
Rail lights are often mounted on the posts of your deck railing, providing subtle illumination that enhances visibility and creates a warm ambiance. These lights can be positioned along the top or sides of the posts to cast light downward onto the deck and surrounding area.
Some key features of rail lights include the following:
Step lights are designed to illuminate stairs but can also be creatively mounted on posts to highlight stair landings or specific areas of your deck. Installing step lights on posts can enhance both safety and visual appeal.
Some key features of step lights include the following:
Once you’ve selected the type of lights, it’s time to gather your tools and prepare for installation.
Before you start installing your deck lights, make sure you have the necessary tools and materials. Here’s a basic checklist:
Once you have your tools and lights ready, you’re set to begin the installation process.
Proper planning ensures that your deck lighting enhances both safety and aesthetics. When mapping out your layout, consider these factors.
Now that you’ve planned your layout, it’s time for deck post lighting installation. But the installation process will largely depend on what types of lights you are installing.
Here’s how you install a rail light on a post.
Here’s how you install a step light on a post.
Once your deck post lights are installed, regular maintenance will help keep them in good working condition:
Deck post lighting installation is a rewarding project that enhances the safety, functionality, and beauty of your outdoor space. With the right tools, materials, and a bit of planning, you can create a well-lit deck that invites you to enjoy your patio or deck long after the sun sets.
Whether you opt for solar, low-voltage, or hardwired lights, the process is straightforward, and the results are well worth the effort.
Ideally, one light on a post should be more than adequate for lighting the surrounding area. However, larger decks and patios with multiple posts will need more fixtures. You might not need lighting at every post, but we recommend a lighting fixture every 5-10 feet for a lighting setup that illuminates the space without oversaturating it.
We recommend anywhere within 3-4 feet of the ground. The goal of these lights is to illuminate the space below and around the posts, not to blind you and your guests, and this height range easily meets those criteria. The recommended height also reduces the risk of accidents caused by lower, protruding fixtures.
Hardwiring fixtures is a reliable method when installing deck lights on posts, but hiding the electrical lines can be a challenge when you’re aiming for an aesthetic presentation. Fortunately, you can invest in non-wiring lighting options, such as solar lights, that can provide a wire-free look in any space. They might not be as efficient compared to a connected light fixture, but they can still light up your space without the presence of wiring.
Join our Insider list and check out the different landscape lighting options that we have to offer.
Sign up for exclusive offers and insight into what’s new for Lighting Warehouse. Elevate your outdoor lighting today!
By inputting your email, you agree to receive recurring promotional emails to which you may unsubscribe at your discretion.
Start Building Your Landscape Lighting System Today at Lighting Warehouse!
Monday - Friday

Speak to us at 855-444-8424