Table of Contents: Connecting LED Strips
Why Choose LED Strip Lights for Landscape Lighting?
Learning how to connect LED strip lights is worth the effort because of their versatility in outdoor lighting projects. Outdoor strip lighting setups are the perfect blend of functionality and creativity for outdoor lighting projects, making them a fan favorite for homeowners and professionals alike. Whether you’re enhancing your yard’s ambiance or making it safer for you and your guests, outdoor LED strip lights offer endless possibilities, thanks to the following features.
- Energy Efficiency: LED strip lights are known for their high energy efficiency compared to traditional lighting options such as incandescent or halogen bulbs. LEDs use significantly less electricity, which can be a key factor when figuring out how to lower electric bills and your environmental impact.
- Durability: LED strip lights are designed to withstand various outdoor elements. For example, many models come with weatherproof coatings or are specifically engineered to be resistant to moisture, dust, and extreme temperatures.
- Flexibility: The thin and flexible design of LED strip lights allows for versatile installation in spaces where other lighting options may be impractical. Whether you use them on curved surfaces, narrow spaces, or irregular shapes, LED strip lights offer a seamless, wide-ranging solution for accent lighting, architectural features, and decorative displays.
- Customizability: LED strip lights provide extensive customization options to suit your unique preferences and needs. From adjusting brightness levels to selecting different lighting color temperatures, they offer a high degree of personalization for your outdoor spaces.
Gathering the right lighting tools and materials is the first step toward a hassle-free installation. With everything on hand, you’ll ensure the installation process goes smoothly and efficiently, saving time and avoiding unnecessary interruptions.
Here’s everything you need for LED strip installation:
- LED strip lights (ensure they are rated for outdoor use)
- Power supply (compatible with your LED strip voltage)
- LED strip connectors
- Mounting clips or adhesive backing
- Weatherproof casing or conduit (optional for added protection)
- Measuring tape
- Scissors (if the strips are cuttable)
- Wire stripper (if connectors require wiring)
- Drill (optional, for securing mounting clips)
- Cleaning supplies (rubbing alcohol and a cloth)
Step 1: Plan Your LED Strip Light Installation
Successful outdoor lighting starts with thoughtful planning. When you define your goals, measure your space, and choose the right type of LED strip lights, you can set yourself up for a seamless and satisfying project. And if you don’t have a plan, it can lead to wasted time, unexpected expenses, and a final result that doesn’t live up to your vision.
Here’s what you need to keep in mind before purchasing strip lights:
- Define the Purpose: Defining the primary use of your LED strip lights ensures the right placement for optimal performance. For example, setting up for path lights may require brighter linear strip lights for safety, while a deck ambiance could benefit from softer RGBW LED lights to set the mood.
- Measure the Area: Accurately measure the area you want to illuminate to determine the correct length of your LED strips. Use a measuring tape to calculate the total length of the surface or path where you plan to install the strips. Taking precise measurements will help avoid over-purchasing or underestimating the amount of strip lighting you need.
- Check Power Accessibility: Determine if there is a nearby power outlet that can be easily accessed or if you will need to use an extension cord or low-voltage transformer for your LED strip lights. Low-voltage transformers are often required for outdoor applications to prevent overloading circuits.
- Choose Waterproof Strips: Look for LED strips with an IP65 or higher IP rating, which means they are protected against dust and water exposure. These waterproof strips are designed to withstand rain, humidity, and other environmental factors.
- Purchase Strip Lights: Once you’ve measured and determined what additional equipment you’ll need, you can go ahead and purchase your LED strip lights.
Step 2: Prepare the Surface for Your LED Strip Lights
A well-prepared surface gives you a better chance of achieving a secure installation and long-lasting results. Cleaning and drying the area not only improves adhesion but also ensures your lights stay firmly in place, even in challenging outdoor conditions.
To prepare the surface for your LED strip lights:
- Clean the Area: Before connecting LED strips, make sure that the installation surface is clean and free of contaminants. Start by wiping down the surface with a clean, lint-free cloth to remove loose dust and debris. Then, use rubbing alcohol to thoroughly clean the surface and eliminate grease, oils, and stubborn dirt to reduce the risk of peeling or detachment over time, as well as potential issues with dirt buildup.
- Dry Completely: Let the surface dry completely before installing your LED strip lights. Even small amounts of moisture or residue can weaken adhesive bonds, leading to eventual failure of the strip lights. Ample time for the surface to fully dry can take anywhere from 15 minutes to an hour, depending on the environment.
Step 3: Test Your LED Strip Lights
Before committing to your new installation, a quick test run can save you from surprises later. Checking functionality and settings now ensures your lights will deliver the effect you envision.
To test your LED strip lights:
- Connect to Power: Begin by plugging the LED strip into the appropriate power source, such as a power adapter, low-voltage transformer, or compatible outlet. Ensure that the voltage matches the strip’s specifications to avoid damage or underperformance.
- Inspect for Damage: Before fully connecting LED strips into your setup, inspect it carefully for any signs of damage. Check for broken segments, cut sections, or malfunctioning LED bulbs.
- Test Brightness and Colors: Once your LED strip is connected to power, take the time to test its brightness and color settings. Consider installing an LED dimmer switch, another controller, or a compatible app to adjust settings, ensuring the strip meets your desired lighting effect.
Step 4: Cut and Connect the LED Strips (If Needed)
Customizing LED strips to fit your space is easier than you think. With simple tools and careful handling, you can achieve a perfect fit for any project.
To customize your LED strips:
- Locate the Cut Lines: LED strips are designed with specific cut points, indicated by a scissor icon or designated cut lines. These areas are carefully positioned so that cutting the strip will not damage the internal circuitry. Usually, cutting the strip outside of these marked areas can lead to non-working segments or short circuits. Double-check that the scissor icon or cut lines are clearly visible and correctly positioned before proceeding.
- Use Scissors: When you cut an LED strip, use the right tools to avoid damaging the circuitry. Use scissors or a utility knife with a fine, sharp blade for making precise cuts along the designated cut lines. Avoid using blunt or improper cutting tools, which can lead to uneven cuts or damage to the sensitive circuitry within the strip. Cut along the marked line for clean separation of segments.
- Attach Connectors: After cutting your LED strip, use LED connectors to safely rejoin segments or establish a connection to a power source. LED connectors come in various types, including solderless clip connectors, soldered connectors, or adhesive-backed connectors. These connectors provide a reliable connection that restores the flow of electricity and ensures that all LED segments light up properly.
Step 5: Install the LED Strip Lights
Installing your LED strips is where the magic happens. Whether you’re using adhesive backing or mounting clips, follow the right method to ensure your lights are secure and positioned just as you planned.
If you use adhesive backing to install LED strips:
- Peel off the Backing: Before attaching the LED strip, carefully peel off the adhesive backing from the strip’s surface. Take your time so that you don’t accidentally damage the strip or tear the adhesive. The adhesive backing is designed to provide a strong bond with clean, dry surfaces, such as wood, metal, or smooth walls. Make sure that the adhesive surface is clean and free from dust or grease for the best adhesion.
- Press Firmly: Once the adhesive backing is exposed, press the LED strip firmly onto the desired surface. Apply even pressure along the entire length of the strip. The right amount of pressure helps secure the strip in place with a lasting bond, eliminating air bubbles and reducing the risk of the strip loosening over time.
If you use mounting clips to install LED strip lights:
- Mark the Positions: Before securing the mounting clips, carefully mark the positions along the surface where the clips will be placed. Space them out evenly so that the LED strip is uniformly supported. Depending on the length of the strip, you can space out the clips about every 6-12 inches. Use a measuring tape or level for pinpoint accuracy.
- Secure with Screws: Drill the screws into the surface to secure the mounting clips. Use the right screws for the type of surface—wood screws for wood surfaces, drywall anchors for drywall, or masonry screws for concrete or brick. Drive the screws in straight and tighten them to make a solid base for the clips to securely hold the strip.
- Snap the Strip Into the Clips: Once the mounting clips are firmly attached to the surface, snap the LED strip into place. Make sure the strip is fully seated and secure within the clips. Check that the clips hold the strip evenly, and that there is no wobbling or movement to prevent sagging or dislodging.
Step 6: Connect the LED Strip Lights to Power
Powering your LED strips is the final step in bringing your vision to life. By following proper safety measures and sealing the connections, you can enjoy reliable lighting for years to come.
To connect your LED strip lights to power:
- Position the Power Supply: Position the power supply for your LED strip lights in a dry and protected location, shielded from moisture, extreme temperatures, and potential physical damage. Ideally, your outdoor power supply should be installed within a weatherproof enclosure such as a NEMA enclosure, IP-rated box, or enclosure with a gasket to help protect against moisture, dust, and electrical hazards.
- Plug in the LED Strips: Use the provided connectors to attach the LED strips to the power supply for a stable electrical connection between the strips and the power source. Whether you’re using solderless clip connectors, snap-in connectors, or other compatible methods, make sure the connections are secure to avoid a loose connection.
- Seal Connections: Protect any exposed wiring by sealing the connections with waterproof tape or connectors. Waterproof tape provides a reliable barrier against moisture, dust, and other environmental elements, preventing shorts or damage to the LED strips. Waterproof connectors create a strong, water-resistant connection, protecting your installation from rain, snow, or humidity.
- Test Again: After all your connections are secure and sealed, power on your LED lights to confirm that everything is working properly. Carefully monitor the strips for any flickering, dimming, or uneven lighting. If you notice any issues, address them promptly to prevent further complications with the installation.
Step 7: Fine-Tune Your LED Strip Lights
Dialing-in your setup and securing loose components will make for a polished, professional finish. Automation features such as timers or control devices can take your setup to the next level.
To fine-tune your LED strip lights:
- Adjust Placement: Sometimes, initial placements may not provide the desired effect. You might encounter uneven brightness or coverage in certain areas. Whether it’s adjusting for better visibility along a pathway or enhancing the aesthetic effect of accent lighting, carefully evaluate the layout and adjust the strips so that they evenly illuminate the intended areas. Use a level or measuring tools to ensure symmetry and uniform illumination.
- Secure Loose Wires: Use cable ties or clips to secure any loose wires. Untidy or unsecured wires can create safety hazards and reduce the overall professionalism of the installation. Cable ties or clips can help prevent wires from becoming tangled or exposed, which could lead to damage or interference with other elements of your lighting setup.
- Incorporate a Timer or Controller: Add a timer or smart controller to automate your LED lighting system. A timer lets you set specific on/off schedules, so the lights are only on when needed, which can save energy and extend the lifespan of your LED strips. Smart controllers, on the other hand, provide more advanced features, such as adjusting brightness, color settings, and syncing with other smart home devices, allowing for customized lighting experiences based on time of day, events, or moods.
Maintenance Tips for Your LED Strip Lights
Simple lighting maintenance on your LED strip lights is an easy way to preserve their longevity. A little care goes a long way in keeping your outdoor space beautifully illuminated!
To properly maintain your LED strip lights:
- Clean Periodically: Over time, dust, dirt, and debris can accumulate on the surface of your LED strip lights, obstructing light diffusion and reducing their overall brightness. Gently wipe the strips with a damp cloth or soft microfiber towel. Avoid using harsh chemicals or materials that could damage the strip’s surface or its adhesive backing.
- Inspect for Damage: Regularly check the strips for signs of wear, such as bent or broken segments, exposed circuitry, or water damage. Water damage is a common issue for outdoor LED strips, so inspecting for moisture buildup or corrosion can prevent short circuits or electrical malfunctions.
- Replace as Needed: While LED strips are known for their long lifespan, they are not indestructible. Over time, sections of the strips may become damaged due to wear and tear, exposure to harsh environments, or accidental cutting or bending. Promptly replace any damaged sections so that the entire system continues to function efficiently. Use replacement connectors or new strips as needed.
More Creative Ideas for LED Strip Lights
From illuminating pathways to accentuating landscaping features, LED strip lights can transform any outdoor space into a stunning visual experience.
For more creative ideas, use your LED strip lights for:
- Pathway Illumination: Installing LED strips along garden paths or driveways can create a soft, ambient glow that guides visitors through your outdoor spaces. Use flexible, waterproof LED strips for pathways exposed to rain, snow, or extreme temperatures.
- Deck Accents: Adding LED strips as deck lights to provide lighting for safe movement and a visually striking effect, especially at night. These can act as outdoor accent lighting fixtures, which can highlight the contours of the deck, adding depth and warmth to outdoor spaces.
- Water Features: For enhancing your ponds, fountains, or swimming pools, using waterproof LED strips can create a mesmerizing visual effect. Water reflects and diffuses light, transforming water features into focal points of your outdoor spaces.
- Pergola Lighting: To create a cozy, inviting atmosphere for pergolas, LED strips are an excellent choice. Mounted along the beams or posts, these lights provide soft, ambient illumination that enhances the overall charm of outdoor gatherings.
- Accent Landscaping: Highlighting trees, shrubs, or rock gardens with LED strips adds drama and texture to your landscaping design. These flexible strips can be strategically placed to bring attention to specific elements of your garden, creating visual interest and depth. You can even use RGB or color-changing strips for dynamic, seasonal changes.
Installing LED strip lights in your landscape can elevate your outdoor space with functionality and style. Their small profile and versatility in terms of installation can make them a go-to fixture for any type of landscape lighting, from outlining a notable tree or adding a layer of whimsy to specific pathways. With static and RGB colors available, you can find the perfect LED strip lights to add to your curb appeal efforts. With the right tools and this step-by-step guide, you can create a professional-looking installation that’s both durable and visually stunning.
Ready to light up your landscape? Dive in and let your creativity shine!
FAQs on How to Connect LED Strip Lights
When should you use mounted vs. adhesive LED strip lights?
Mounted LED strip lights are ideal for surfaces that may need extra stability or where adhesive bonding is impractical due to uneven textures or rough materials. For example, mounting clips are particularly useful for installations on outdoor concrete, brick, or metal surfaces where adhesive strips may not adhere properly or could become compromised over time.
Plus, mounted LED strips are a great choice for high-traffic areas or locations exposed to frequent movement, as they provide a more secure attachment. On the other hand, adhesive strip lights work best on smooth, flat surfaces where a strong, permanent bond is required, such as wood, glass, or smooth drywall. They are perfect for indoor use in areas like cabinets, backsplashes, or decorative trim, where flexibility and ease of installation are prioritized.
What should I do if my LED strip lights aren’t lighting up evenly?
If your LED strip lights aren’t illuminating evenly, the first step is to inspect the connections to ensure they are secure and properly aligned. Loose connectors can cause uneven power distribution, resulting in inconsistent lighting.
evenly, the first step is to inspect the connections to ensure they are secure and properly aligned. Loose connectors can cause uneven power distribution, resulting in inconsistent lighting. Check the surface where the strips are attached—if the surface is dirty or not cleaned properly, the adhesive may not bond correctly, causing gaps in illumination. Repositioning the strips or adding additional mounting clips can help achieve a more uniform light distribution. As we mentioned earlier, using a level during installation ensures that each section of the strip is spaced evenly, preventing any irregular lighting patterns.
Can LED strip lights be used in areas with high humidity or direct water exposure?
Yes, LED strip lights with an IP65 or higher rating are designed to withstand high humidity, rain, and even temporary submersion in water. These waterproof strips are ideal for outdoor applications like bathrooms, decks, or patios where exposure to water and moisture is common. For maximum durability, it’s essential to seal connections with waterproof tape or connectors to prevent water ingress. Properly sealed installations ensure that the LED strips maintain their performance and longevity in areas where moisture is a constant concern.
Where can I cut LED strip lights?
There are specific points on LED strip lights where you can safely cut them without destroying the entire strip. Look for a small copper section, which might have a scissors symbol on it, throughout the strip. You can cut on this line to create multiple sections of LED strip lights that can then fit into any shape you need. You can also connect these strips together with connectors so that you can power a lengthy strip of LED lights from a single power source.
Is it possible to replace a small section of LED strip lights if they aren’t working?
The ability to split LED strip lights makes them easy to repair without taking down the entire fixture. Simply cut the affected area, specifically at the indicated cutting lines or copper connectors, and replace it with new LED strip lights. Make sure that the surface to which the strip will attach is clean and free of debris before putting the new strip in place.
What power sources are available for LED strip lights?
The versatility of LED light strips also extends to their power source. Some models might come with their own plug that you can put into any outdoor outlet. However, there are many variants available that don’t require constant power and instead utilize batteries or even solar panels. For a more permanent solution, you can create a setup where the strips are connected to your fuse box. However, you will need a low-voltage transformer as well to convert the supplied voltage to safer, lower voltage levels.
Join our Insider list and check out the different lighting options that we have to offer.
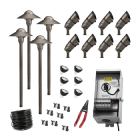 Easy-Install Kits
 Uplights
 Path & Walkway Lights
 Flood & Wall Wash Lights
 Hardscape Lights
 Step Lights
 Outdoor Deck Lights
 Outdoor Bulbs
 RGBW Color Lights
 Downlights
 Underwater Lights
 Bistro String Lights
 Holiday Decorations
 In-Ground Well Lights
 Accessories
 Solar Lights & Portables
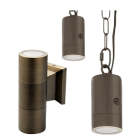 Specialty Lights
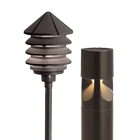 Bollard Lights
 Tape Lights
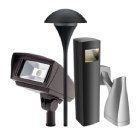 120V Landscape Lighting
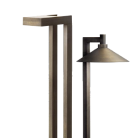 Dark Sky Approved Lights
 Connectors
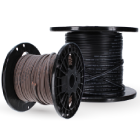 Wire & Cable
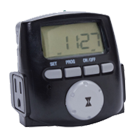 Timers & Control Devices

